Monday, March 23, 2015

Creating vignettes.

Creating vignettes isn't as hard as you may think. As a decorator and home stager, I often see my clients creating this decorating mistake I call, "ducks-in-a-row". You know, when you go to the county fair, and they have the game that lines, "ducks-in-a-row" where you shoot and win a prize? Yes that one!! I often will see that style of decorating in a client's home.  But vignettes are more about grouping then single lines! There are guidelines you can use, to help you get started.


1. Assemble. Go corral  items you want to display. See what jumps out at you.


2. Anchor.  It's the first thing you see and it sets the tone. Anchor objects tend to be larger in scale. They can be a painting, a sculpture or even a lamp.  In this case it's the Juju hat.


3. Scale & shape. Use odd numbers when creating vignettes. Why? Because they are more harmonious and pleasing to the eye. Also, make sure all your pieces aren't the same height. So if one of you items is 2", pair it with another item that is 1". This creates variation in height, which create symmetry.  Notice the two flower arrangements? One half the size of the other.


4. Create a theme. Some of the most striking and interesting vignettes have some sort of theme through them. Themes can be color, elements - like wood or metal, or collections - like nautical. The key word here is assortment. Just remember when using collection, ex..elephants, don't use ALL you elephant pieces together. Why? Because you don't want it to look like you're in a zoo gift shop!!


5. Create depth. Place your items from back to front, instead of a straight line. Remember ducks-in-a-row? This create dimension and interest.


6. Vary the texture. Mix rough with smooth, shiny with dull, wood with iron. This will offer an array of texture.


7. Edit and admire. Take a step back and look at your work. Is it "working" for you? Something not quite right? Edit it until you feel it, "works" for you. Have fun and enjoy the process!!


Monday, March 9, 2015

Revamping your Old Kitchen Cabinets

Revamping your old kitchen cabinets isn't as difficult as you may think. As a decorator and home stager, I get asked this question a lot, "What can I do to update my kitchen, without spending a lot of money?" There are a few solution that you can do to update your kitchen, without the heavy expense of remodeling.


The easiest and by far least expensive, is to paint them!


Add beadboard to flat paneled door. Then paint it.


Remember these cabinets? Very trendy in the eighties, but so outdated now!! Using 2" wood strip, it completely changed the look of the cabinets!! Loved how they turned out.


Don't want to spend money on beadboard? Use paintable beadboard wallpaper. Easier to cut, same great effect!!


Use half-round decorative molding to achieve this look. Then paint it any color you want!!


As you can see, there are many ways to update the look of your kitchen cabinets, without blowing the budget. Takes a little time, but the results are simply amazing!! And with all the money you just saved, you can splurge on the backsplash or counter, maybe even both!! For more information on these projects, check out Pinterest.


Monday, March 2, 2015

When selling you home, don't forget the landscaping!!

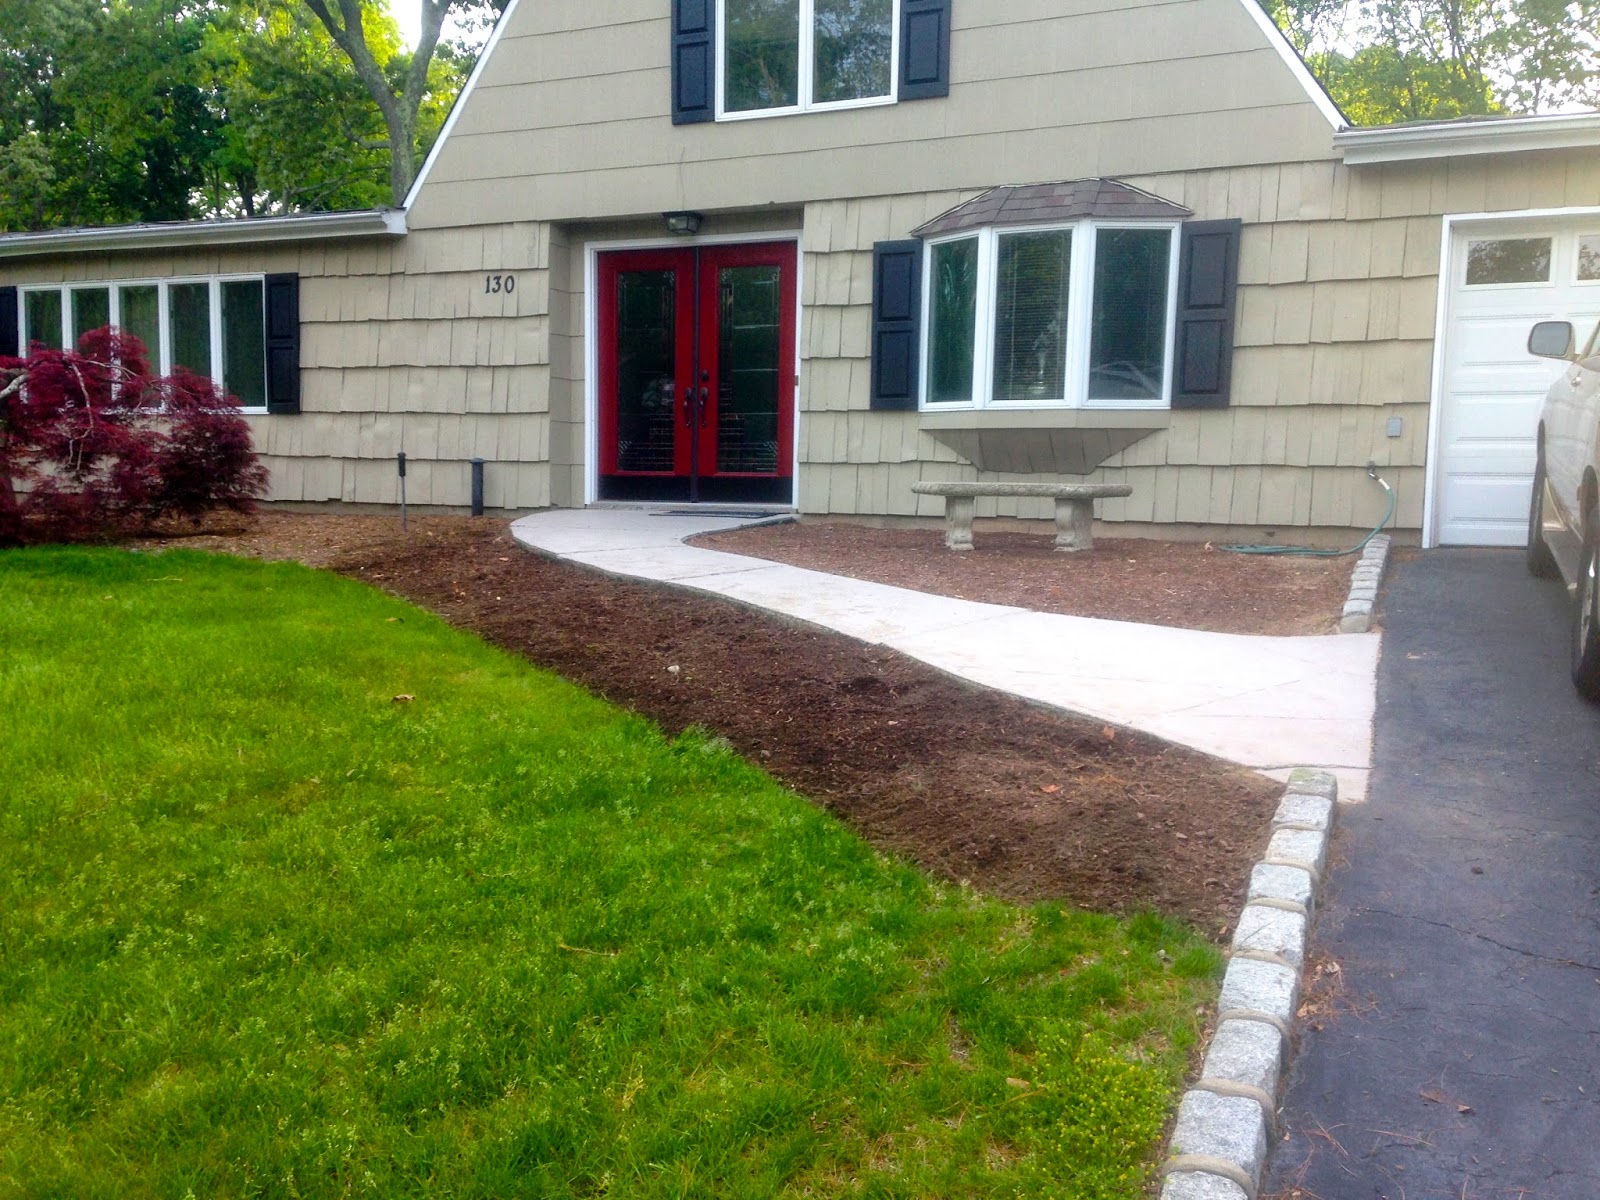
When selling your home, don't forget about the landscape. Most of my clients think about the interior of the home, and forget about the exterior. But it's important to remember buyers will do a drive by, and if they don't like what they see outside, you may never get them inside your home. You don't have to spend a considerable amount of money, but you will be incurring some expenses.  I firmly believe, it's worth every penny. 


Recently, I redesigned my landscape. In a few months, I will be selling my home and I wanted to make sure the landscape will appeal to the buyers.  As you can see, it need to be painted, and some of the shingles needed to be replaced. 


Not ready for her close-up at all!!


The landscaping was bare, and not at all appealing!!


There were "bald" areas that were definitely in need of some plants!!


All freshly painted. I adding some shutters for visual interest. I even painted the front door!! But I was not crazy about those bushes!!


So I personally removed them. Let me tell you, it looked like I got into a fight with a badger, and the badger won. I was all scratched up, but I felt good when it was all done!!


Loved the outcome!! Gave the house a better viewing from the street! Wide open!

 Now comes the planting. There were many empty areas that needed some plants.


Definitely needed some planting here!!


Hired a landscaper, they mulched and planted both sides!!


So much better!!


Now she is ready for her close-up!!


What a difference!! Landscaping is a vital part of staging. It showcases your home in the best possibly way, offering potential buyers a hint of the beauty inside! When it comes to staging, people DO judge A BOOK BY IT'S COVER.  You don't have to spend a lot of money.  If possible, you can do a lot of the work yourself, like I did. Hire the professional when you can't do it yourself.  
Is your home ready for it's close-up?

Monday, February 23, 2015

No more boring lampshades!!

No more boring lampshades. How many times did you buy a lamp, but weren't in love with the shade?  Next time, before you think of purchasing another shade, think about decorating the old shade. There are so many ways to decorate a shade.


Add flowers!


Use self adhesive cut outs!

Embellish it!

Decorate with ribbons!

Add fabric!

Add an old sweater!

Use an old map!

Cover it with tulle and roses!!

Add jute!

Stencil it!!

Have you child create art!!


As a decorator, I will often suggest decorating the shade to give it a unique and personal look. Check out Pinterest, they have a lot of ideas you can implement. Whatever you choose to do, have fun and be creative!!


Monday, February 9, 2015

Chic Shelf liner, not just for drawers!

Shelf liner are not just for shelves anymore. Gone are the days when they were plain and boring. Today's shelf liners are chic and  come in so many styles. They can be used just about anywhere. Check out some of these great ideas. 

Sew Many Ways - On metal can.

My Love of Styles - Light switches.

My love of Styles - Book cases.

Orchard Girls - Storages items.

Bump to Bean - Murals


With so many possible uses for shelf liner, the question is what CAN'T  you use it on? I know I'm going to purchase some. I have my eyes on some projects I want to tackle. How about you?


Monday, February 2, 2015

What CAN'T you do with pallets?!!!

What can't you do with pallets? Seems like you can do, just about anything! You just need a little creativity, pallets, and time. I've come across so many wonderful projects, I decide to share some of my favorites with you. Some are relatively easy to do, some take a little more work. All look amazing!!!


Pallet Bar

Pallet Bench

Pallet Bench

Pallet Decorative Shelf

Pallet Headboard

Pallet Wine Holder

Pallet Rolling Patio table


Pallet Rolling Coffee Table 

Pallet Magazine/Coat Rack

Pallet Deck

Pallet Patio Furniture

The next time you're driving around and see pallets laying around, grab them. Or go to any home improvement stores, and get them there. Just make sure you leave some for me!!